
COMPARISON OF SKYDIO X10 SENSOR PACKAGES FOR 3D SCANNING: VT300-Z VS VT300-L
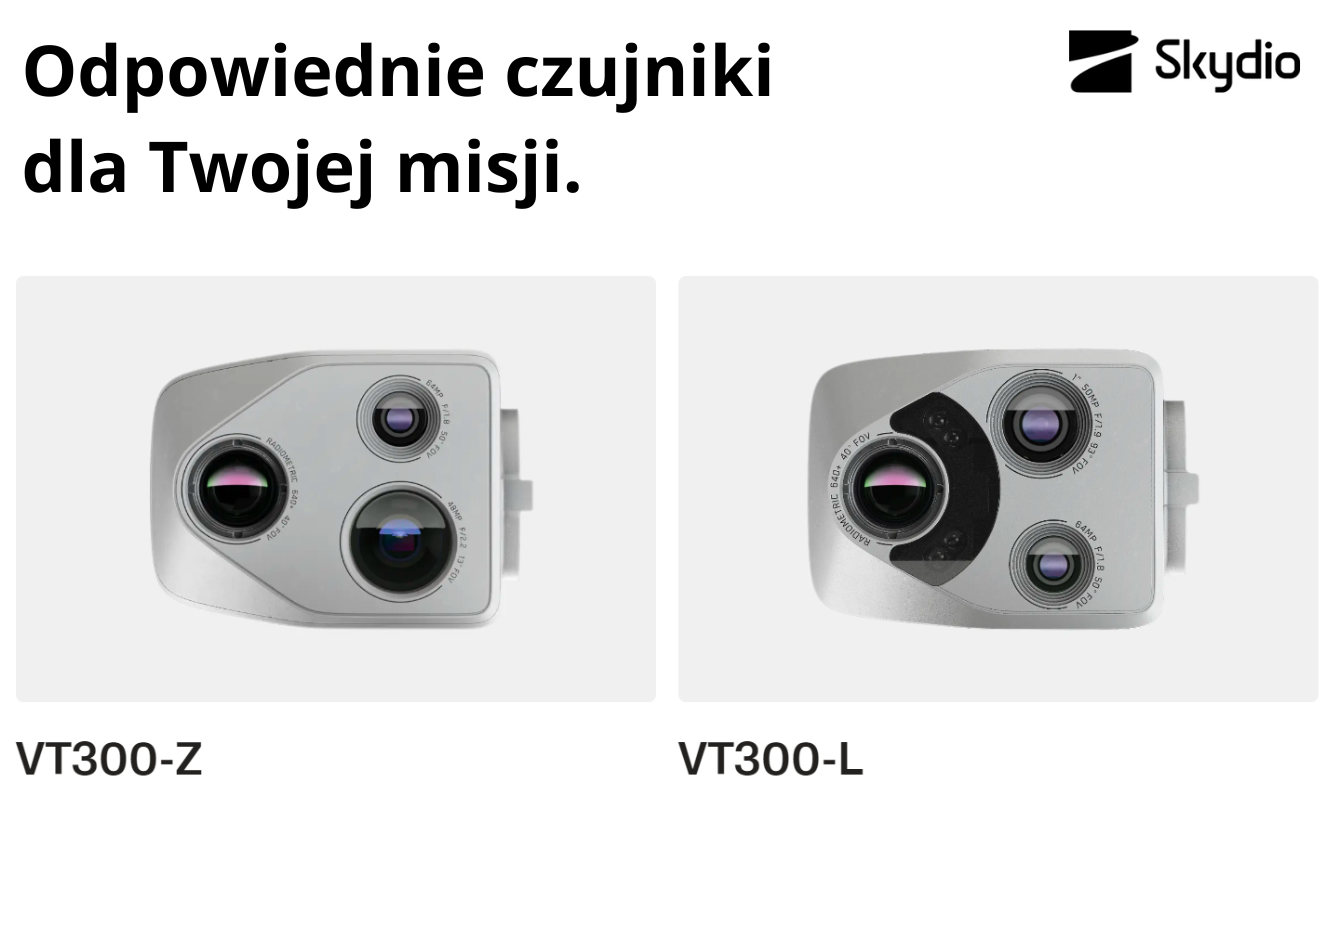
There are two different sensor packages available with Skydio X10: the VT300-Z and the VT300-L.
VT300-Z is designed for longer stand-off use cases in which increased zoom capabilities are preferred. Features a Narrow, Thermal, and Telephoto camera.
Note: Zooming is not available while actively scanning.
VT300-L is designed for optimal performance in lowlight environments, at short stand-off distances, and capturing wider shots. Features a Narrow, Wide, and Thermal camera, plus a flashlight.
Note: You are able to utilize the flashlight on VT300-L while scanning. However, doing so may impact photogrammetry reconstruction results.
Comparison of VT300-Z and VT300-L Sensor Packages
| Features | VT300-Z | VT300-L |
|---|---|---|
| Application | Long-distance scanning, enhanced zoom capabilities | Low-light performance, short-distance scanning, wide shots |
| Cameras | Narrow, Thermal, Telephoto | Narrow, Wide, Thermal + Flashlight |
| Ideal Conditions | Long-distance applications | Low-light conditions and confined spaces |
| Limitations | No zoom during active scanning, challenges with complex geometries | Potential impact on photogrammetry results when using the flashlight |
| Recommended Uses | Inspections, surveying, 3D modeling at long distances | Inspections, surveying, 3D modeling in low-light and tight spaces |
If you are scanning with the VT300-L sensor package, you have the ability to choose either the Wide or Narrow camera.
Wide camera
|
|
|
Narrow camera If you only have access to the Narrow camera via the VT300-Z, this sensor package can still be used for 3D modeling and photogrammetry, but it’s important to note a few key trade-offs: |
|
|
The Narrow camera is not as successful when capturing structures with complex geometry. If you are scanning a structure with limited access or in a congested environment, you will see gaps in coverage for concave structures and incomplete reconstructions. The Narrow FOV requires a larger Distance to Surface (DtS) than the Wide FOV to achieve the same GSD. In congested environments, this may prevent the drone from reaching certain waypoints that are only attainable when scanning at closer distances (e.g., unable to scan between girders). This is also because the drone tries to maintain consistent Ground Sample Distance (GSD) between each photo. |
|
|
It is still possible to create 3D reconstructions of complex objects, but the results may be suboptimal. To effectively use the Narrow camera to create a reconstructed model, experiment with different DtS values to find one that ensures complete coverage and efficient time on-site. |
|
|
Note: If you are scanning with the Narrow camera and plan to combine multiple smaller scans into a single model, we recommend an overlap between scan volumes. |
Resolution Recommendations
Resolution is measured in megapixels and refers to the amount of detail in your images.
- Full - images are captured at the highest quality, providing more detail and clarity.
- ¼ - Images are captured at one-fourth of the full resolution, resulting in smaller file sizes. Best for scanning in lowlight conditions.
Additionally, you have the option to specify your Camera Mode:
- Standard - Designed for typical, everyday lighting conditions. Provides a balanced, standard level of exposure, image processing, and contrast.
- Low Light - Designed for environments with dim lighting, such as dusk or evening. Settings are adjusted to capture more light, reduce noise, and improve visibility. Only available with 1/4 Resolution.
- HDR - Designed to capture environments with a wide range of brightness levels. Not recommended for use in brightly lit environments. Only available with 1/4 Resolution.
|
Full Resolution Scenes with daytime lighting conditions. Default option for most scans. |
|
|
1/4 Resolution Environments with average lighting conditions. Examples include areas with shade, under a bridge, or in indoor environments with standard lighting. |
|
|
1/4 Resolution Scenes with dim lighting, such as scanning in the evening or dusk. Examples include a parking lot with streetlights, or dimly lit indoor environments (e.g., warehouses). |
|
|
1/4 Resolution Scenes with a wide range of brightness levels. An example is a wooden bridge. Since some light can pass through the planks, underneath the deck may be dimly lit. It is not recommended to use HDR in brightly lit environments. |
Bridge deck Underneath the deck |
|
Note: We recommend enabling Stop for Photo when scanning in lowlight and night environments to ensure the best image quality. This will significantly increase scan time, but minimize motion blur. |
|
White Balance
White Balance refers to the balance of color temperature in your photo. If the whites in your picture are too orange, for example, adding the opposite color (blue) will balance them out.
- Lower values result in a cooler (blues) image while higher values result in a warmer (yellows) image
- Auto (default) means Skydio X10 will automatically adjust the White Balance for its environment
We recommend setting your own White Balance value when scanning. One factor of a successful reconstruction is color consistency between images. Due to this, using the default Auto White Balance is not recommended, as it could result in color tint variations between images and therefore lead to poor reconstructions.
Setting your White Balance
|
Step 1 - Open Camera settings Located on the right side of the screen |
|
|
Step 2 - Select the Capture tab |
|
|
Step 3 - Adjust the slider Your live camera feed will automatically update to show a preview of the changes. Use this to select your desired color temperature. |
|

